Holidays

How To Make Santa Footprints
Some kids just need a liiittle more proof.
For some kids, simply seeing presents under the tree is enough evidence that Santa Claus exists. For others, they get the magic from sitting on his lap in the mall, or watching him on TV, or even listening to the onslaught of Christmas songs that takes over nearly every radio station starting Thanksgiving night. But curious kids might need even more confirmation that Mr. C. actually shimmied himself down the chimney. So get ready to be crafty, because learning how to make Santa footprints can make the holiday more magical — and if we’re honest, a bit messier, too.
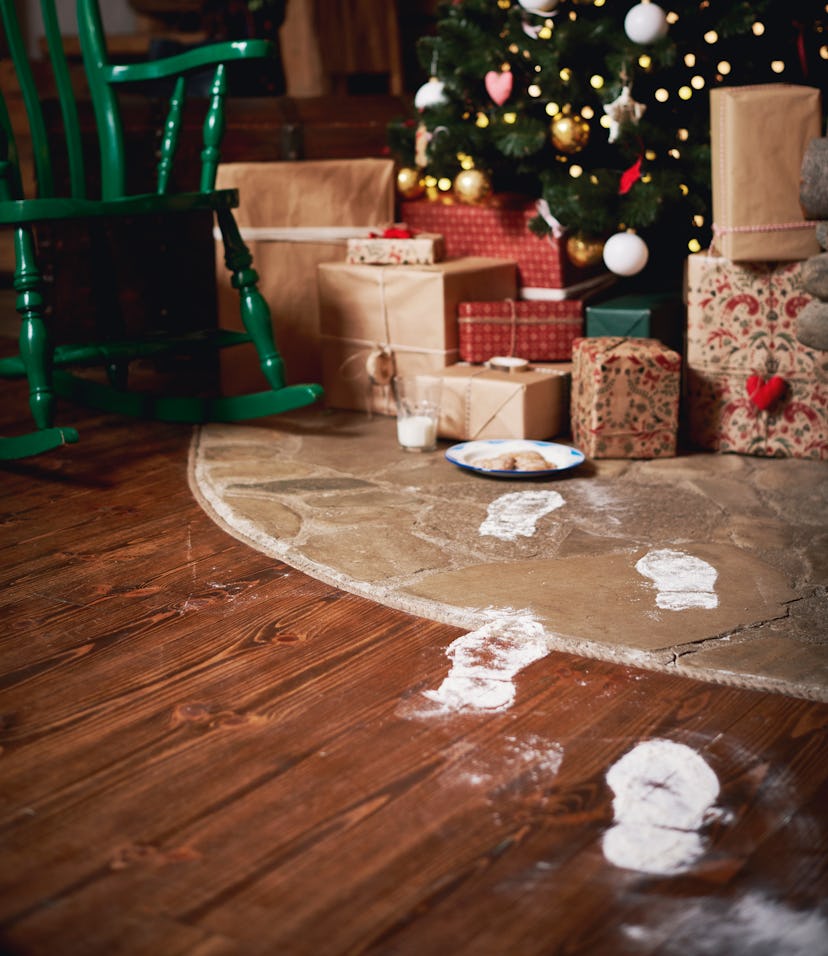
What exactly are Santa footprints? Well, they’re supposed to be the imprint left on your floor from Santa’s boots. And seeing as how St. Nick has made his way from the North Pole, it makes sense that his boots would be snow-covered. So basically, what you’re replicating are his white boot prints on your floor.
How to make Santa footprints
There are quite a few ways you can make Santa footprints, and most don’t require much more than some powder or even paper. Read on to see which one will help you, er, Santa, put their best foot forward.
Use flour for a full-on effect
Luckily, making Santa footprints doesn’t require a whole heck of a lot of ingredients. All you’ll need are a big pair of boots (after all, Santa Claus is a tall fella), some flour or baking soda, and a bit of water. Place the flour or baking soda on a large plate or cookie sheet. Dip the bottom of the boot into the powder of your choice, and then press the boot onto the floor. If it’s not sticking well enough to the bottom of the boot, you can spritz or brush the sole of the boot with water before dipping it into the white powder. Be sure to space out the footprints so it looks like Santa was actually walking. Although you could wear the boots to make the footprints, you’ll have to keep taking the off to dip into the water and then the flour, which will make your footprints look a bit fuzzy.
Create an outline
If you’re committed to the idea of making Santa footprints but don’t want to put powder all over your boots, you can always opt an outline instead. Place the boots on the floor and carefully add flour or baking soda around the boot. It creates a cool effect, and doesn’t require nearly as much powder.
Use a stencil
Making Santa footprints by using a stencil eliminates the need for potentially making a powdery mess out of your shoes. If you have a Santa Claus footprint stencil, just place them on the floor near the tree and fill them in with flour. For an even cooler effect, sprinkle some shimmery glitter on each footprint — it will give the footprints an icy snow effect.
Cut footprints out of paper
In a few hours’ time, your floor is about to be covered in a whirlpool of wrapping paper. So if you don’t want to add baking ingredients to the mess, you can simply use white card stock or construction paper instead. Just trace a pair of boots onto paper, cut, and tape down onto your floor. Your kids will be so excited to see the prints (and the presents) that they hopefully won’t notice that they’re on printer paper.
Where to put Santa’s footprints
As for where the footprints will go, that’s entirely up to you and your space. If you have a chimney, that’s the obvious starting point for putting down the footprints. But if you are without a fireplace, you can always make it look like Santa came through the front or back door.
How to clean Santa’s footprints
Now, if you have hardwood floors or laminate, using powder or flour isn’t really a problem. You can easily sweep up Santa’s footprints after your child wakes up in the morning and sees irrefutable proof that Santa did indeed come to your home. But if your house is covered in carpet, be prepared to do some serious vacuuming after your child has opened their gifts.
Making Santa footprints is a fast, easy, and fun way to make Christmas even more special for your child. Just make sure that your child doesn’t try to lick the “snow.”
This article was originally published on